
A 3-inch tomahawk steak is no ordinary cut of meat—it’s a culinary masterpiece that deserves attention to detail. To achieve steakhouse-quality results, timing and technique are paramount. This guide will take you through every step, from preparation to grilling and beyond, ensuring that your steak is cooked to perfection while retaining its succulent flavor and tenderness.
Why a 3-Inch Tomahawk Steak Deserves Special Attention
The Unique Charm of a Tomahawk Steak
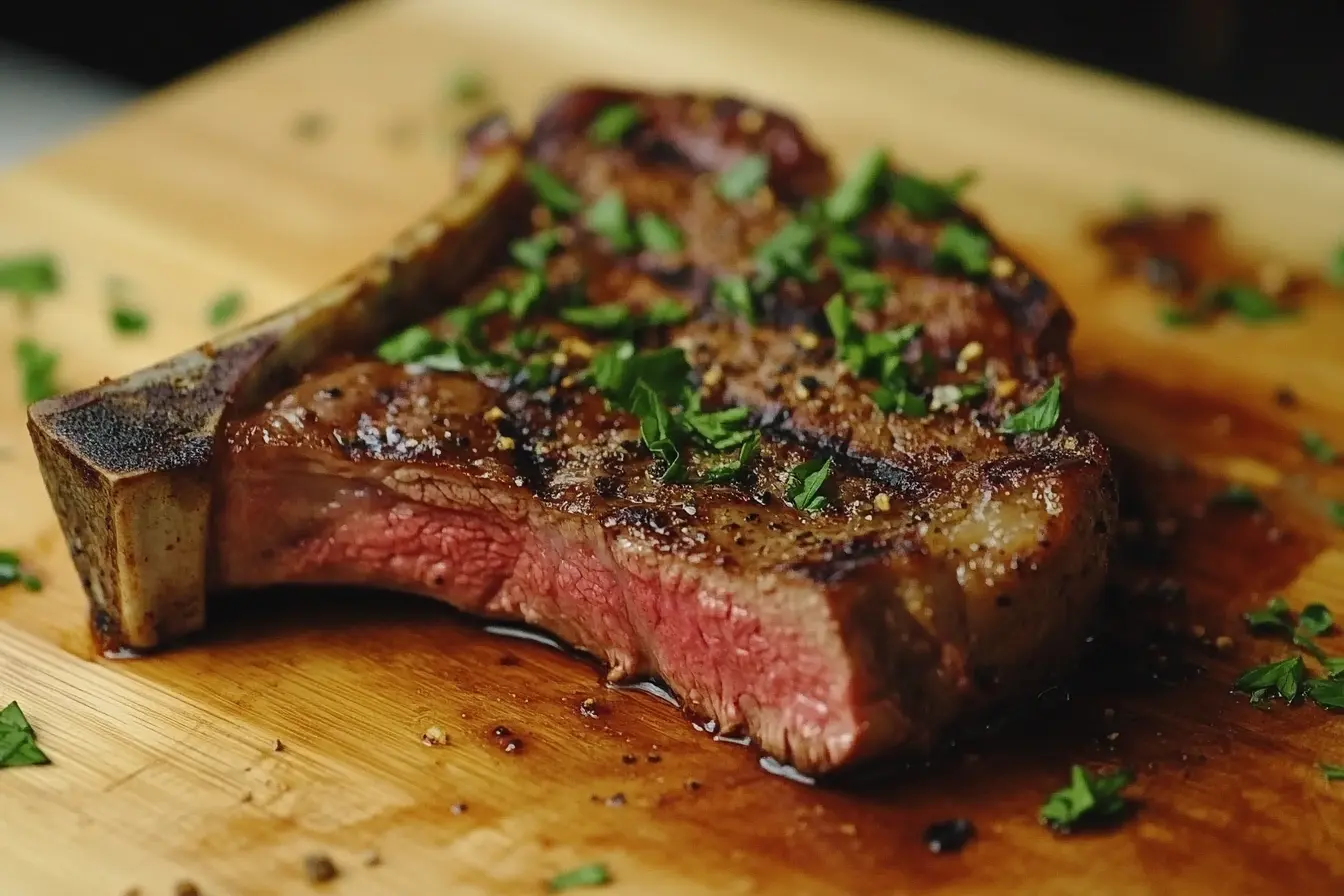
Tomahawk steaks are not your average steaks; they’re a visual and gastronomic delight. Cut from the ribeye, this bone-in marvel often impresses with its size and dramatic presentation. The bone not only enhances the steak’s aesthetics but also contributes to its rich, beefy flavor as it cooks.
Challenges of Grilling a Thick Tomahawk Steak
Cooking such a thick cut can be tricky. Without proper preparation, it’s easy to end up with a steak that’s charred on the outside but undercooked in the middle—or worse, one that’s dry and chewy. The key is mastering the grill setup, timing, and temperature control.
Why Timing Matters Most
So, how long does it take to grill a 3-inch tomahawk steak? Timing is crucial because a steak this thick requires a balance of searing for a crispy crust and slow cooking to achieve the desired doneness. Whether you’re aiming for a perfect medium-rare or prefer a more well-done steak, knowing the correct timeframes will save you from guesswork.
Preparation Steps Before Grilling
Selecting the Perfect Tomahawk Steak
When it comes to grilling a 3-inch tomahawk steak, the journey to perfection starts at the butcher’s counter. Always opt for a well-marbled steak—those streaks of fat running through the meat ensure juiciness and flavor. Look for USDA Prime or Choice grades for the best quality. The thickness should be consistent to allow for even cooking. If you can, choose a steak that’s bright red with a creamy white bone for freshness and optimal presentation.
Essential Tools for Grilling Success
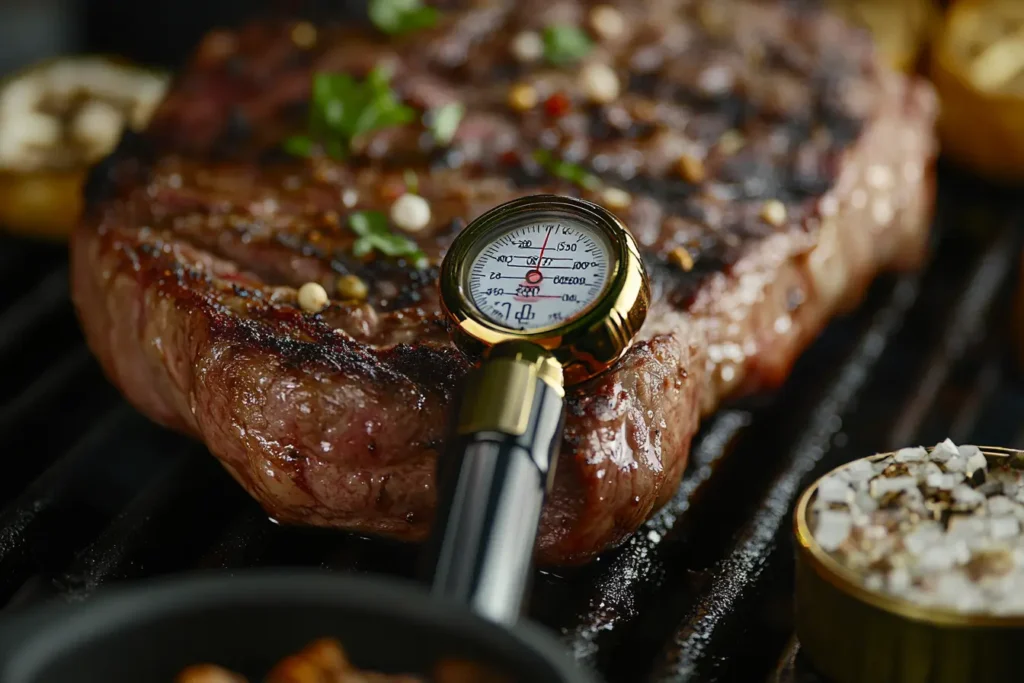
Before you fire up the grill, gather the right tools. A reliable instant-read thermometer is your best friend for checking doneness without cutting into the meat. Sturdy tongs are essential for flipping and handling the steak without piercing it, which helps retain juices. Finally, prepare your grill setup based on whether you’re using charcoal, gas, or a pellet grill. For perfect tomahawk steak results, mastering your equipment is half the battle.
Grill Types and Their Advantages
- Charcoal Grills: Impart a smoky flavor and allow for higher searing temperatures.
- Gas Grills: Offer convenience and better temperature control.
- Pellet Grills: Provide precision and consistent heat for longer cooks.
Pre-Grilling Preparation
Step1: Thawing the Steak Properly
Thaw your steak in the refrigerator overnight if frozen. Avoid rushing this process by using a microwave, as uneven thawing can lead to disappointing results.
Step2: Seasoning Like a Pro
Generously season your tomahawk steak with coarse salt and freshly cracked pepper. For an extra kick, consider a dry rub with garlic powder, smoked paprika, and a hint of chili. The seasoning will form a flavorful crust during searing.
Step3: Resting Before Grilling
Allow the steak to rest at room temperature for 30-45 minutes before grilling. This step ensures even cooking and prevents the meat from being shocked by the intense heat of the grill.
The Grilling Process
How to Set Up Your Grill for a 3-Inch Tomahawk Steak
Grilling a thick tomahawk steak requires the right setup. By creating both direct and indirect heat zones, you’ll have greater control over the cooking process. This two-zone grilling method is ideal for searing the steak to achieve a flavorful crust and then finishing it slowly to the desired doneness.
Setting Up a Two-Zone Grill
- For Charcoal Grills: Arrange the coals on one side of the grill for direct heat and leave the other side empty for indirect cooking.
- For Gas Grills: Turn on one or two burners to high for direct heat, leaving the remaining burners off for indirect cooking.
- For Pellet Grills: Preheat the grill to the searing temperature, then adjust the heat for indirect cooking as needed.
Maintain a grill temperature of approximately 450°F for searing and 275-300°F for indirect cooking.
Step-by-Step Grilling Instructions
Searing for a Perfect Crust
Start by placing the steak on the hottest part of the grill to develop that signature crust. Sear each side for about 2-3 minutes, pressing gently with tongs to ensure even contact with the grates. This step locks in the juices and adds a smoky, caramelized flavor.
Transitioning to Indirect Heat
After searing, move the steak to the cooler side of the grill. Cover the grill with the lid to trap the heat, effectively turning it into an oven. Use this stage to cook the steak slowly and evenly without burning the exterior.
Monitoring Internal Temperature
Use an instant-read thermometer to keep tabs on the steak’s internal temperature:
- Rare: 120-125°F (Approximately 20-25 minutes total cooking time)
- Medium-Rare: 130-135°F (25-30 minutes total)
- Medium: 140-145°F (30-35 minutes total)
- Well-Done: 155-160°F (35-40 minutes total)
Insert the thermometer into the thickest part of the steak, avoiding the bone, for an accurate reading.
The Reverse Sear Method
For a more precise approach, you can employ the reverse sear method. This technique involves cooking the steak over indirect heat first, bringing it close to the desired internal temperature. Once it’s about 10°F below the target, finish with a quick, high-heat sear. This method ensures even cooking from edge to edge while delivering a beautifully charred exterior.
Resting and Slicing the Steak
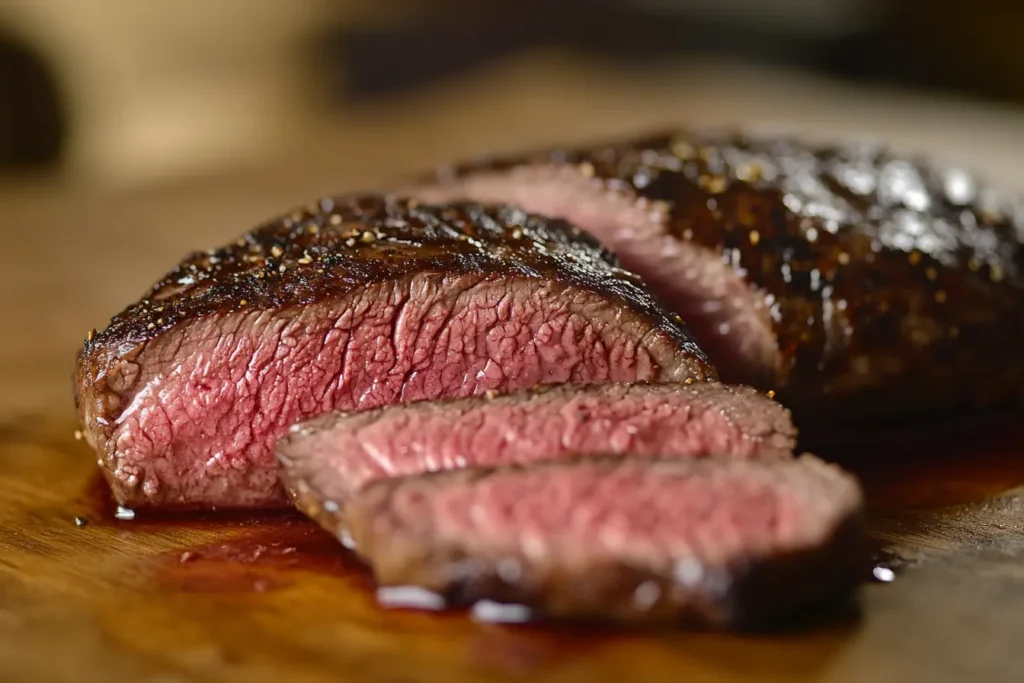
Once your steak reaches the desired internal temperature, remove it from the grill and let it rest for 5-10 minutes. Resting allows the juices to redistribute throughout the meat, enhancing tenderness and flavor. Slice the steak against the grain into thick, juicy slices to make every bite unforgettable.
Common Challenges and How to Avoid Them
Overcooking or Undercooking Issues
Grilling a 3-inch tomahawk steak to perfection can be daunting, especially if you’re not familiar with handling thick cuts of meat. One of the most common pitfalls is overcooking or undercooking the steak. The secret to avoiding this lies in temperature control and timing.
Solution: Use a Meat Thermometer
An instant-read thermometer is essential for accurate results. As tempting as it may be to rely on timing alone, the thermometer ensures your steak is cooked to the precise level of doneness you desire. Remember to check the temperature at the thickest part, avoiding the bone for a true reading.
Achieving the Perfect Sear
Searing is critical for developing a delicious crust, but it can quickly go wrong if not done properly. Flare-ups caused by dripping fat can burn the steak, while insufficient heat may leave it pale and unappetizing.
Solution: Mastering Searing Techniques
- Preheat the Grill: Ensure your grill grates are scorching hot before placing the steak. This helps create a crispy exterior without overcooking the inside.
- Use High-Smoke-Point Oils: Brush the steak lightly with oils like avocado or grapeseed oil to prevent sticking and encourage even browning.
Retaining Steak Juiciness
No one wants a dry steak, but improper handling can lead to a loss of moisture. Over-flipping, cutting into the steak too early, or neglecting to rest it are common culprits.
Solution: Resting the Steak
Once off the grill, let the steak rest on a cutting board, loosely tented with foil, for about 5-10 minutes. This process allows the juices to redistribute evenly, ensuring each bite is succulent.
Handling Unexpected Challenges
- Windy or Cold Weather: Outdoor grilling conditions can affect cooking times. Compensate by slightly increasing grill temperatures.
- Uneven Thickness: If your tomahawk steak isn’t uniformly thick, consider rotating it during cooking to ensure all areas cook evenly.
FAQs About Grilling a 3-Inch Tomahawk Steak
A tomahawk steak is typically 2 to 3 inches thick. The bone-in ribeye cut and thickness contribute to its impressive appearance and longer cooking time compared to thinner steaks.
Both cuts originate from the rib section, but the tomahawk steak is left with a long, Frenched bone, giving it its signature look. This bone also impacts cooking, as it adds flavor and helps retain moisture.
The best way to determine doneness is by measuring the internal temperature:
Rare: 120-125°F
Medium-Rare: 130-135°F
Medium: 140-145°F
Well-Done: 155-160°F
Using a thermometer ensures accuracy and prevents guesswork.
While it’s possible, grilling a frozen steak isn’t recommended for optimal results. A frozen steak will cook unevenly, leading to overcooked edges and an undercooked center. Always thaw your steak in the refrigerator for 24 hours before grilling.
Let your tomahawk steak rest for 5-10 minutes after removing it from the grill. Resting redistributes juices, ensuring that every slice is tender and flavorful.
On to the following discussion, we’ll share expert grilling tips to elevate your steak game and explore complementary flavors that make your meal unforgettable.