
The tomahawk steak isn’t just a cut of beef; it’s a culinary masterpiece that brings visual drama and mouthwatering flavors to the grill. With its impressive bone-in presentation and rich marbling, grilling this steak can feel like an intimidating task. But fear not! This article walks you through the process step by step, ensuring you achieve a juicy, tender, and perfectly grilled tomahawk steak every time. From selecting the right cut to achieving a flawless sear, this guide has you covered.
Let’s dive right into the first part, where we’ll explore what makes a tomahawk steak so unique and how to prepare it for grilling.
Introduction to Grilling a Tomahawk Steak
What Makes a Tomahawk Steak Unique?
The tomahawk steak, often called the “king of steaks,” is a ribeye with an extra-long Frenched bone attached. This bone not only gives it a striking presentation but also adds flavor during cooking. The generous marbling, which is the key to its tenderness and juiciness, makes it one of the most sought-after cuts for grilling enthusiasts.
Its thickness—typically 2 to 3 inches—sets it apart, creating the perfect conditions for a reverse sear technique. This method ensures even doneness with a crusty, caramelized exterior.
Why Choose Grilling?
Grilling imparts a smoky, charred flavor that enhances the steak’s natural richness. It also allows for a stunning two-zone cooking process, ideal for handling the thick cut of meat. Whether you’re a novice or a seasoned grill master, grilling a tomahawk steak is an experience that delivers both visual and culinary satisfaction.
Overview of the Process
To achieve steak perfection, it’s essential to:
- Select the best quality steak.
- Prepare the meat correctly, including seasoning and dry brining.
- Set up your grill with a two-zone system.
- Use the reverse sear method for even cooking.
- Rest and slice the steak properly to lock in its juices.
These steps ensure that every bite is packed with flavor and tenderness.
Preparing the Tomahawk Steak for Grilling
Preparation is key when it comes to grilling a tomahawk steak. By choosing the right cut, seasoning it properly, and allowing it to come to room temperature, you set the stage for a perfectly cooked masterpiece. Let’s explore each step in detail.
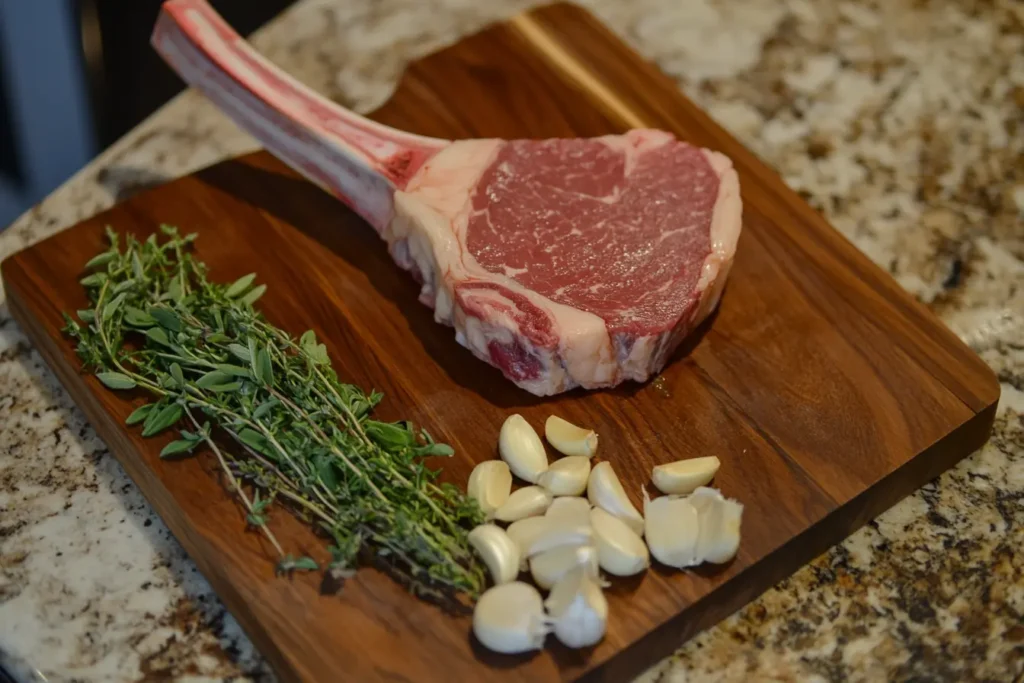
Selecting the Best Tomahawk Steak
Not all tomahawk steaks are created equal. Choosing the right one ensures better flavor, tenderness, and presentation.
- Look for Marbling
The marbling, or the white streaks of fat running through the meat, is essential for flavor. A steak with more marbling will be juicier and more tender when cooked. - Pick the Right Thickness
A good tomahawk steak is thick—ideally between 2 and 3 inches. This thickness ensures the meat cooks evenly and allows for a proper sear without overcooking. - Choose a High-Quality Grade
Opt for USDA Prime or Choice cuts for guaranteed quality. If possible, go for Wagyu tomahawk steaks, which are exceptionally rich and tender due to their high-fat content. - Consider Presentation
The length of the Frenched bone adds to the visual appeal. A longer, cleanly trimmed bone makes for an impressive centerpiece on the grill and at the table.
Bringing the Steak to Room Temperature
Before you even fire up the grill, take the steak out of the refrigerator and let it sit at room temperature for 30-60 minutes. Why is this important?
- Even Cooking: A cold steak will cook unevenly, with the center staying too raw while the outside overcooks.
- Better Texture: Warming it up prevents the meat from seizing up when exposed to high heat, resulting in a more tender steak.
Seasoning the Steak
The beauty of a tomahawk steak is that its natural flavor doesn’t need a lot of help. Keep it simple or add layers of flavor to suit your preferences.
- Basic Seasoning
Generously coat the steak with kosher salt and freshly ground black pepper. These two staples enhance the natural beefy flavor. Rub the seasoning into the meat and don’t forget the sides. - Optional Additions
For a flavor boost, add garlic powder, smoked paprika, or dried rosemary to your seasoning mix. A light drizzle of olive oil helps the spices stick to the steak. - Dry Brining (Optional but Recommended)
Dry brining takes the flavor to the next level. Simply season the steak with salt and let it sit uncovered in the refrigerator for several hours or overnight. This process allows the salt to penetrate deeper into the meat, enhancing its flavor and tenderness.
Tools You’ll Need for Grilling
Having the right tools makes the process smoother and ensures perfect results:
- A meat thermometer for checking the internal temperature.
- Long-handled tongs to flip and handle the steak without piercing it.
- A grill brush to clean the grates before cooking.
Setting Up the Grill for a Perfect Cook
The right grill setup is crucial for achieving a tender and flavorful tomahawk steak. Since this cut is thick, you’ll need a method that ensures even cooking on the inside while giving the outside a beautiful, caramelized crust. This is where a two-zone grilling setup and the reverse sear technique shine.
Choosing Your Grill
The type of grill you use can influence the flavor and cooking process. Both charcoal and gas grills work well, but each has its benefits:
- Charcoal Grill
A charcoal grill delivers unmatched smoky flavor, especially when you add wood chips like hickory or mesquite. Use lump charcoal for a cleaner burn and consistent heat. - Gas Grill
Gas grills are convenient and offer precise temperature control. If you’re new to grilling, a gas grill makes it easier to maintain the low and high heat zones needed for two-zone cooking.
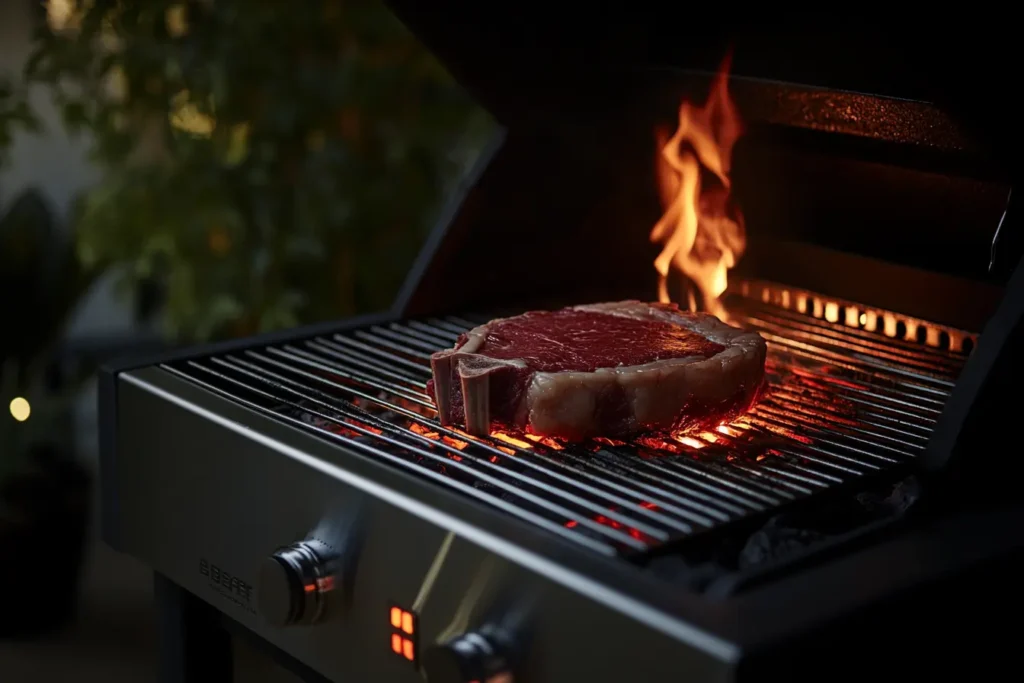
Two-Zone Cooking Setup
The two-zone setup is the secret to perfectly grilling a thick cut like the tomahawk steak. It involves creating two areas of heat on your grill: one for indirect cooking and the other for high-heat searing.
- Indirect Heat Zone
- Set one side of the grill to a low temperature (around 225°F to 250°F). This is where the steak will cook slowly and evenly, preventing the outside from overcooking before the inside is done.
- On a charcoal grill, push the coals to one side and leave the other side empty. On a gas grill, turn on the burners on one side and leave the others off.
- Direct Heat Zone
- The other side of the grill is set to high heat (500°F or higher). This zone is used to sear the steak at the end of the cooking process, creating that irresistible crust.
Enhancing Flavor with Wood Chips (Optional)
If you’re using a charcoal or gas grill, adding wood chips can elevate the flavor of your tomahawk steak. Here’s how:
- Soak Wood Chips: Soak your wood chips in water for 30 minutes to prevent them from burning too quickly.
- Add to the Grill: For charcoal grills, place the soaked chips directly on the hot coals. For gas grills, use a smoker box or wrap the chips in aluminum foil with holes poked in it.
- Choose the Right Wood: Hickory, oak, and mesquite pair beautifully with beef.
Essential Tools for Success
Having the right equipment ensures that your grilling process goes smoothly and your steak is cooked to perfection:
- Meat Thermometer
A thermometer is non-negotiable for a tomahawk steak. It helps you monitor the internal temperature and ensures you hit the perfect doneness. - Long-Handled Tongs
Use sturdy tongs to flip and move the steak without piercing the meat, which could cause juices to escape. - Grill Brush
Clean grill grates are essential for preventing sticking and ensuring even cooking. Always brush your grates before starting.
Step-by-Step Guide to Grilling a Tomahawk Steak
Now that your grill is set up and ready, it’s time to cook the tomahawk steak to perfection. This process combines the reverse sear technique with precise temperature control to ensure a juicy, evenly cooked steak with a beautifully caramelized crust.
Step1: Slow Cooking Over Indirect Heat
Start by cooking the steak slowly in the indirect heat zone. This ensures that the thick cut cooks evenly from edge to center without overcooking the outside.
- Place the Steak
- Position the steak on the cooler side of the grill, away from the direct heat.
- If you’re using a thermometer, insert it into the thickest part of the steak to monitor the internal temperature.
- Close the Lid
- Close the grill lid to maintain a consistent temperature. This step is critical for even cooking and for infusing the steak with smoky flavors (if using wood chips).
- Flip Occasionally
- Flip the steak every 15-20 minutes to ensure even cooking.
- Monitor the Temperature
- Use a meat thermometer to check the internal temperature. Aim for 110°F to 115°F for a medium-rare finish before searing.
- If you prefer medium doneness, target 120°F before the sear.
Step2: Resting Before the Sear
Once the steak reaches the desired pre-sear temperature, remove it from the grill and let it rest for 10 minutes. Resting is crucial for a few reasons:
- It allows the juices to redistribute within the meat, keeping it moist.
- It prevents overcooking during the high-heat searing phase.
Step3: Searing Over Direct Heat
This is where the magic happens. The high heat creates a deep, golden-brown crust while locking in all the flavor.
- Increase the Heat
- On a charcoal grill, open the vents and add more coals if needed to raise the temperature.
- On a gas grill, turn the burners on the direct heat side to their highest setting.
- Sear the Steak
- Place the steak on the direct heat zone and sear each side for 1-2 minutes.
- Rotate the steak slightly during searing to create those perfect grill marks.
- Don’t Forget the Edges
- Use tongs to hold the steak upright and sear the edges for an even crust all around.
Step4: Checking for Doneness
To ensure your steak is cooked just the way you like it, check the internal temperature after searing. Remove the steak from the grill when it’s 5°F below your target temperature to account for carryover cooking.
- Rare: 120°F-125°F
- Medium-Rare: 130°F-135°F (recommended for tomahawk steaks)
- Medium: 140°F-145°F
Step5: Resting and Slicing
After searing, rest the steak for another 10-15 minutes. This step locks in the juices, making each bite tender and flavorful.
- Resting Again
- Place the steak on a cutting board and tent it loosely with foil while resting.
- Slicing the Steak
- Using a sharp knife, slice the steak against the grain. This shortens the muscle fibers, making the meat more tender.
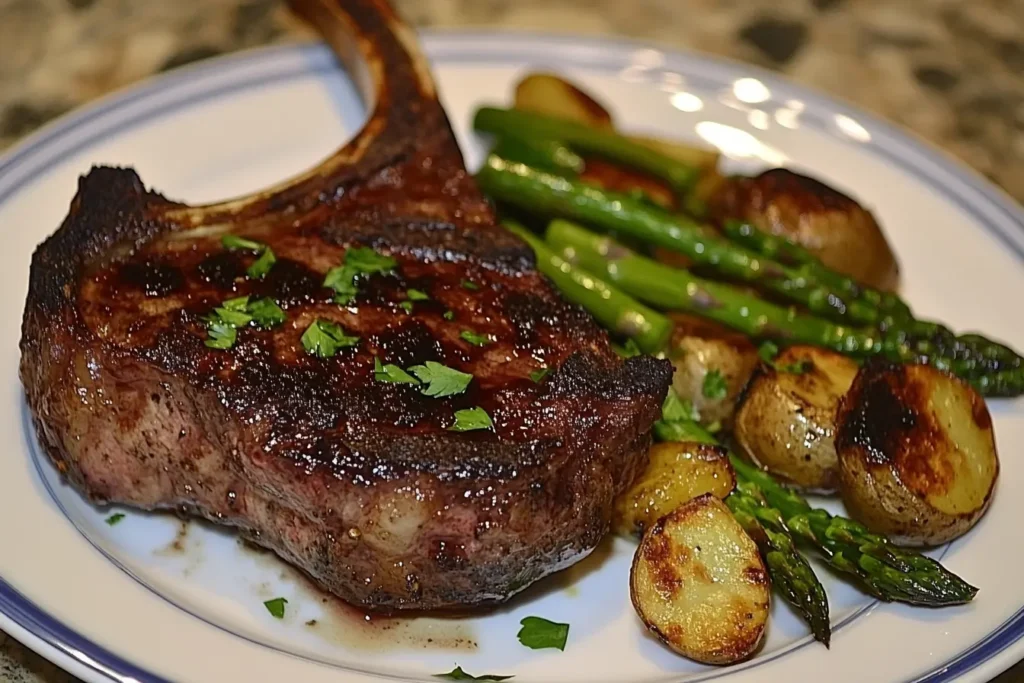
Serving and Pairing Your Grilled Tomahawk Steak
After all your hard work on the grill, it’s time to serve and enjoy your perfectly cooked tomahawk steak. Presentation, side dishes, and flavor-enhancing sauces can elevate this meal into a true culinary masterpiece.
Resting and Presenting Your Steak
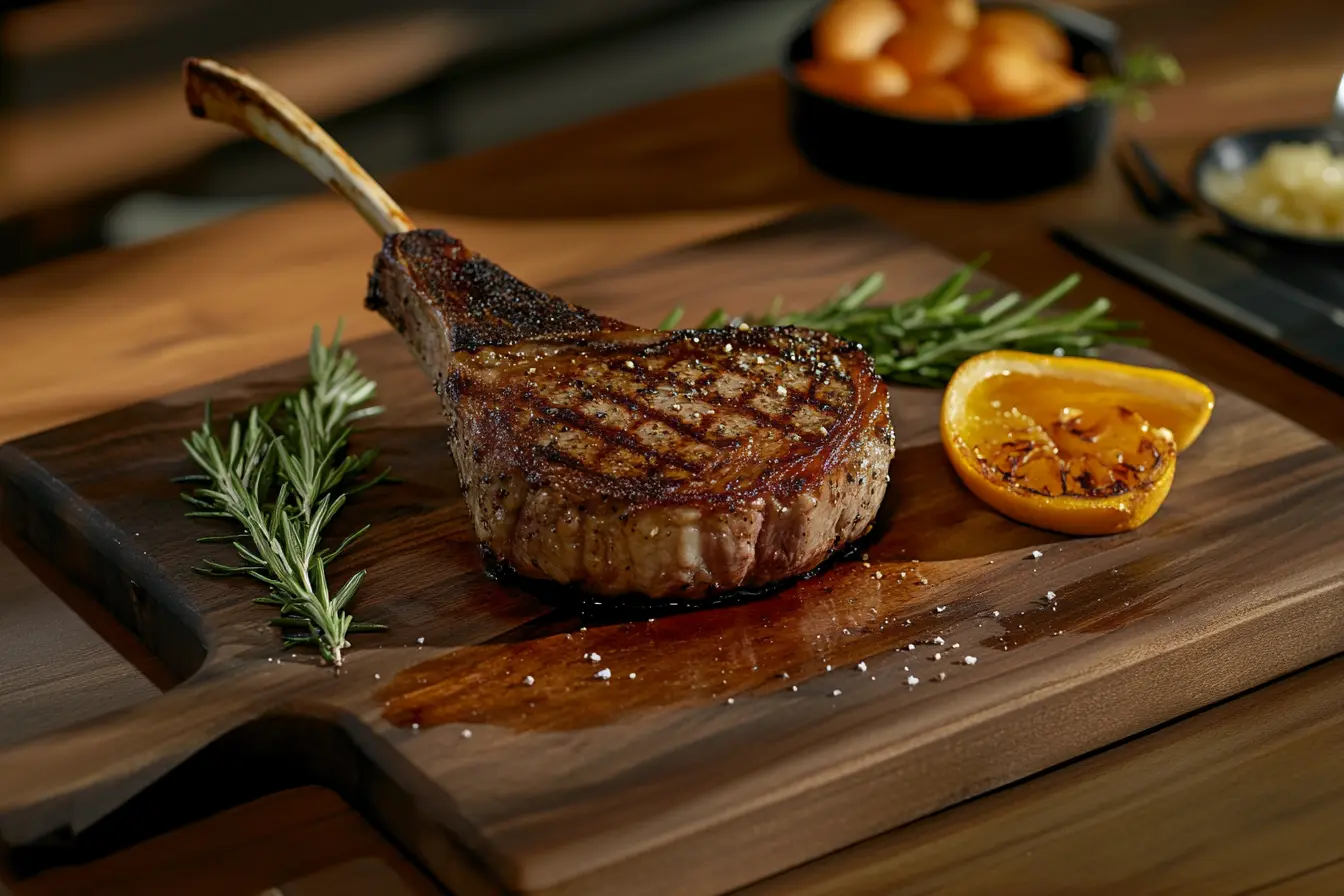
Before slicing into your steak, presentation matters. The long Frenched bone and golden crust make it a showstopper.
- Rest for Juicy Results
- Always let your steak rest for 10-15 minutes after searing. This final resting period keeps the juices inside, ensuring every bite is tender.
- Showcasing the Tomahawk
- Keep the steak whole when presenting it to guests for maximum wow factor. Slice it tableside to emphasize its impressive size and texture.
How to Slice a Tomahawk Steak
Proper slicing enhances the steak’s tenderness and flavor.
- Use a sharp knife to cut the meat away from the bone.
- Slice the steak against the grain into thick strips, about ½ inch wide. This method shortens the muscle fibers, resulting in a melt-in-your-mouth bite.
Classic Side Dishes for Tomahawk Steak
Pairing your steak with complementary sides completes the meal. Here are some ideas:
- Grilled Vegetables
- Asparagus, zucchini, or bell peppers bring a fresh and smoky flavor to the plate.
- Potato Dishes
- Creamy mashed potatoes or crispy roasted potatoes make excellent accompaniments.
- Salads
- A light arugula salad with a tangy vinaigrette balances the steak’s richness.
- Comforting Classics
- Creamed spinach or garlic butter green beans add a rich, savory touch.
Sauces and Toppings to Elevate the Flavor
A great sauce or topping can add another layer of complexity to your tomahawk steak.
- Garlic Butter
- A dollop of garlic-infused butter melts beautifully over the hot steak, adding richness.
- Chimichurri
- This zesty herb-based sauce with parsley, garlic, and olive oil cuts through the steak’s richness.
- Peppercorn Sauce
- A creamy peppercorn sauce adds a luxurious, slightly spicy element.
FAQs
Grilling a tomahawk steak may seem daunting at first, but addressing some common questions can simplify the process. Here are answers to frequently asked questions about preparation, grilling, and serving this impressive cut.
How Long Should You Grill a Tomahawk Steak?
Grilling time depends on the steak’s thickness and desired doneness. On average:
- Slow cook the steak over indirect heat for 45-60 minutes.
- Sear each side for 1-2 minutes on direct heat.
- Use a meat thermometer to track the internal temperature rather than relying solely on time.
What is the Best Temperature to Grill a Tomahawk Steak?
For the reverse sear method:
- Use indirect heat at 225°F-250°F to slowly cook the steak.
- Crank the temperature to 500°F or higher for the searing phase.
This approach guarantees an even cook with a perfect crust.
Should I Marinate My Tomahawk Steak?
Marinating is optional for this cut. Since the tomahawk steak has rich marbling, simple seasoning with salt, pepper, and olive oil is often enough. However, if you enjoy bold flavors, try a marinade with garlic, herbs, and citrus for a unique twist.
Conclusion
Grilling a tomahawk steak is more than just cooking; it’s an experience that combines preparation, skill, and the satisfaction of serving a showstopping meal. By following the steps outlined in this guide, you’ll consistently deliver a steak that’s tender, juicy, and full of flavor.